
How-to watercolor a cow picture
I can be very guilty of jumping into artistic projects without ample planning. Watercolor is a very loose medium but perhaps the most unforgiving, in my option, and requires a certain amount of prep time. Details can not be painted over like acrylics or oils, but each stroke is intentional. So join me as we walk through a watercolor cow tutorial and unpack tips for painting success.
1. Start with a great reference photo
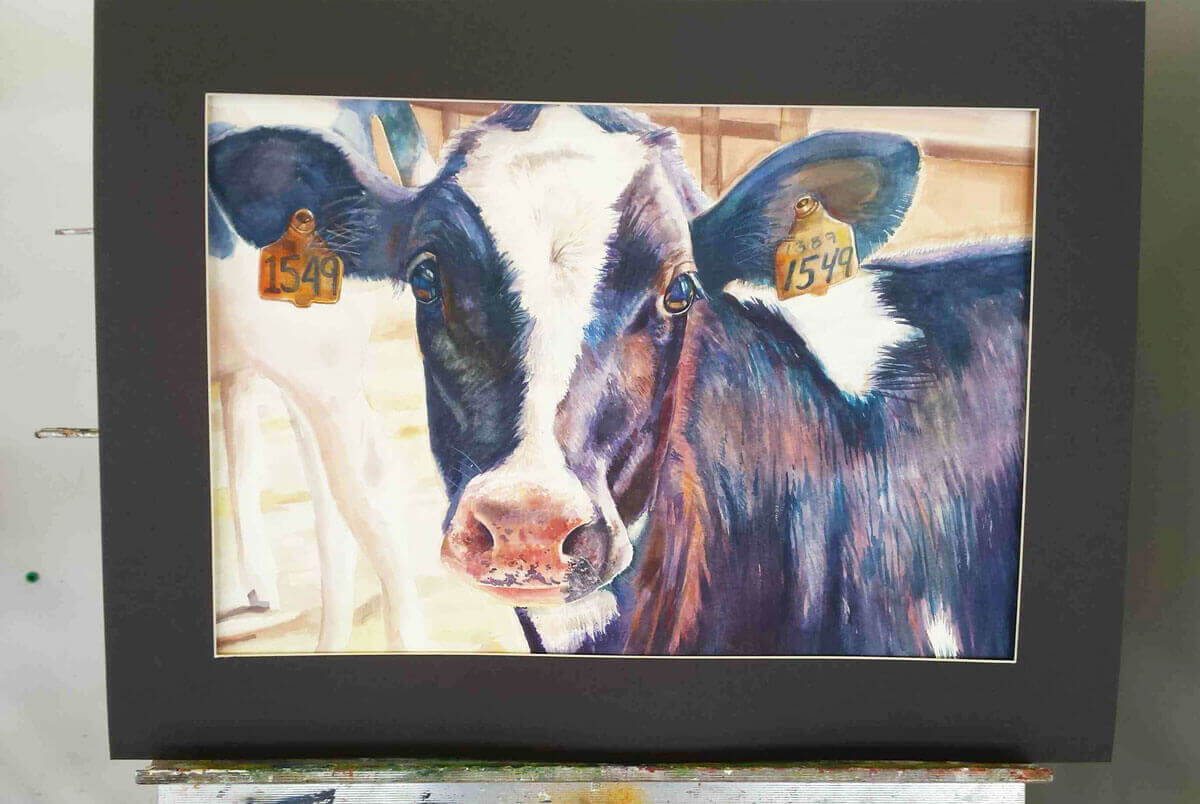
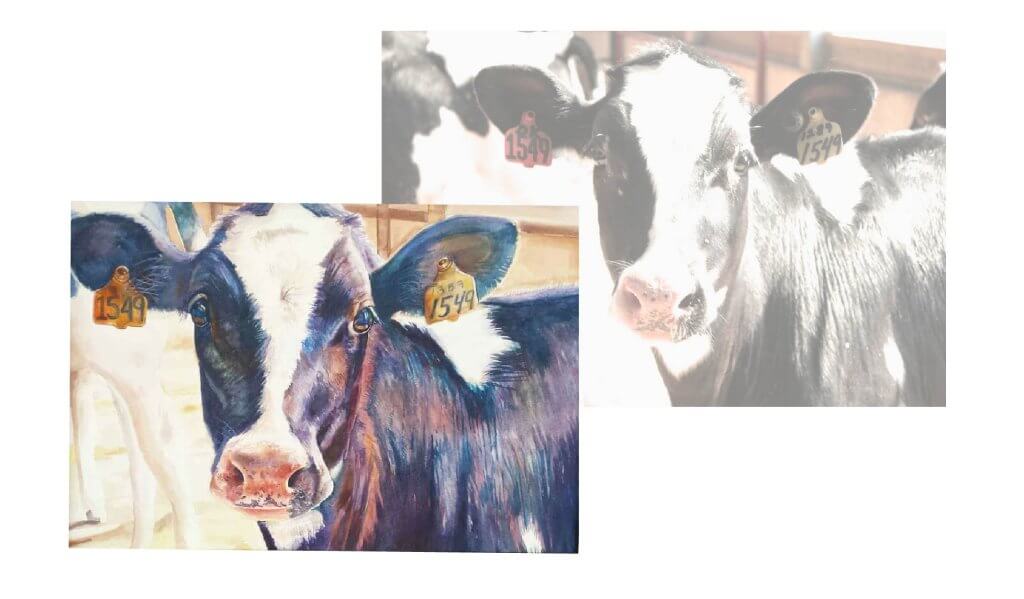
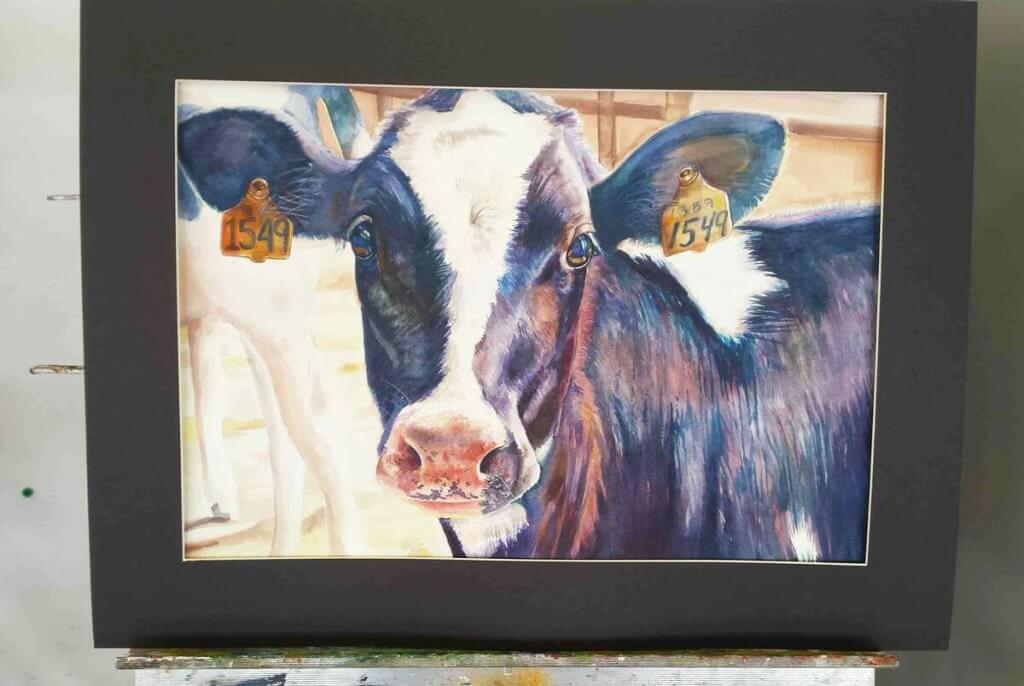
Every professor I have spoken to always stresses the importance of starting with a personal reference photo. I have also found this helpful when capturing details and lighting to fit what you have in mind. Growing up on a dairy farm, my love for the outdoors, specifically cows, shines through my work. My reference photo was a bit washed out so I did use pieces of other images.
2. Take an inventory of your materials
When it comes to paper, I prefer Arches watercolor paper and sometimes use a cold press or hot press depending on the project. This basically means that the surface is smooth or has a little bumpier texture. Overall, I like the thickest version possible but you can expect to pay a bit more and it makes the project more intimidating.
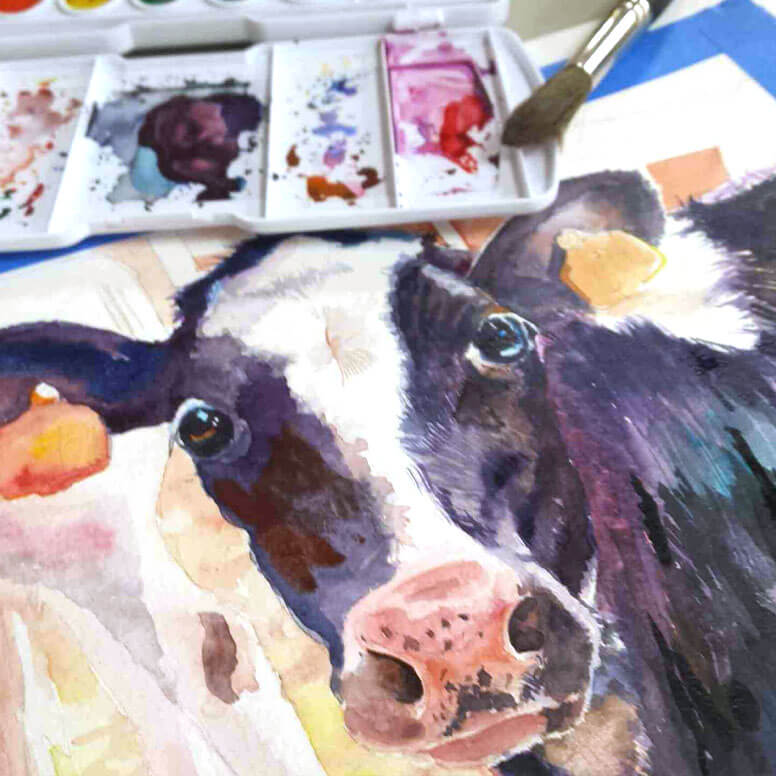
For watercolor, I do prefer the Prang brand as my go-to pallet. This is not a costly option but was a preference a professor in college suggested and I was hooked. It has great value and depth overall and usually I choose several individual colors as a “splurge” from other high-end brands. Yellow especially can be the hardest to get quite right.
For brushes, I would recommend what you feel comfortable with. I own some natural hair bristles and more synthetic and love features of both. However, brushes are a lot like a favorite outfit. Someone can give you suggestions but ultimately you have to find what you love.
Note: No recommended products are sponsored in anyway just personal preferences.
3. Create a small scale drawing
Once you have a reference photo start building a small-scale rendering on the same paper you plan to paint the final. This step helps avoid later unforeseen difficulties and get familiar with the paper and materials before starting a big one. It is a lot less disappointing that way — trust me. Have fun with the colors but try to create as if it were the original.
4. Upgrade to the larger paper
Once you feel comfortable moving on to bigger paper, some choose to transfer the ideas with tracing paper or projectors. Feel free to use what you would like with a light sketch on your paper. Be gentle with erasing not to remove any sizing, or the overall paper finish. You will know if you do when the paper is more like a paper towel, absorbing everything, without a smooth finish.
5. Love the layers
Build out your images with first a layer of yellows for extra warmth and depth. This obviously depends on your image but mine suited well for this technique. You can use a wet-on-wet for this step and make the paint flow all over. This is simply just wetting your paper and getting it damp so when you touch it with color it spreads.
When creating depth and shadows, think in terms of layers and colors. Choosing opposite colors on the spectrum help with contract and selecting deep navy where you want to place blacks creates a lot more depth. In fact, this little guy used more purples and blues while one would think more black and greys.
My technique involves jumping around the image a bit and finalizing other details. This is simply a preference but if an area is drying, it can be nice to focus on another part before you do more layers.

6. Take a step back
When I paint, I tend to be so hyperfocused on the small details I never take a step back. This is really easy to do and can create an unexpected outline look or too much detail. Not every portion needs to be hyperrealistic. Let the background flow with color or leave a piece for the imagination. This is truly the beauty of watercolor.
As Bob Ross always said, “We don’t make mistakes, just happy little accidents.”
Have fun, experiment, and enjoy the journey.